
Developing your knitwear sample, step by step
A practical guide to the conversations, material choices and specifications that turn a collection idea into a sample the buyer can assess.
Production minimum: 60 pieces per order, at least 25 pieces per style/colour/size. Total quantity for each style; colour allocation is reviewed separately. For quantities below 60 per order, the Startup Brand Program can help review development or sampling.
What happens after the initial proposal is agreed?
Knitwear sample development begins by translating the selected design direction into a written brief. We clarify the garment’s intended appearance and fit, compare suitable yarn and knit options, agree colour and measurements, confirm the development scope and then make a sample for review. Approval of that sample becomes the reference for the next production decision.
A budget proposal establishes what the project is trying to achieve. The sample brief establishes what we are going to make. The more clearly those two documents connect, the easier it is for the buyer to assess the result and for the development team to understand any requested changes.
1. Start with the product the buyer wants to sell
The first conversation should go beyond “make it like this picture.” We need to understand who will wear the garment, the intended fit and season, the preferred feel, and which details matter most to the brand.
A reference image can communicate shape and styling. Close-ups can explain texture and construction. A tech pack can organise the measurements and details. When information is incomplete, the open decisions should be written down rather than left for the sample maker to guess.
- Which design features must remain close to the reference?
- Should the garment feel light and fluid, structured, dense or softly relaxed?
- What is the intended sample size, and how will the buyer check the fit?
- Which artwork, trims and branding files are available?
- What development budget and target timing should guide the material choices?
A good brief can also include an example of something the buyer wants to avoid: an overly loose hem, a bulky seam or a fabric that feels too open. Clear comparisons often resolve more than broad words such as “premium.”
2. Compare materials before committing to a full garment
For knitted garments, material selection brings together the yarn, knitting structure, gauge, density and finishing. We would compare these choices against the intended appearance, hand feel and budget, rather than choosing a fibre percentage from a photograph alone.
The discussion should establish a suitable direction first. The final composition, colour reference and any agreed weight or performance requirements then belong in the sample specification. Our guide to yarn, gauge and knit density explains how these variables work together.
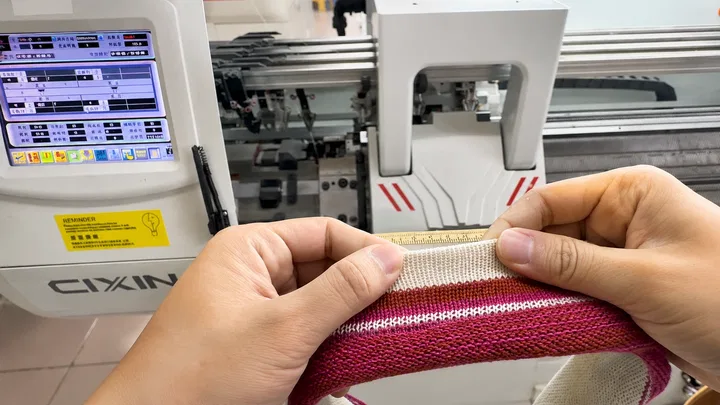
Choose how the buyer will confirm colour and hand feel
Photos and video can help narrow the choices. Useful views show the surface, reverse, drape and relevant stitch detail under consistent lighting. They should identify whether the material is an existing reference or a newly developed trial.
Physical swatches allow the buyer to touch the material and view the colour directly. Where material feel is central to the design, it can be useful to agree a swatch stage before making a full garment. Any development fee and dispatch cost should be confirmed in advance.
Digital selection leaves more of the assessment until the garment arrives. Physical selection adds a stage and may add cost and transit time. We explain those trade-offs so the buyer can choose a route that suits the project.
3. Build one agreed sample specification
Once the direction is selected, the discussion needs a clear written reference. Scattered messages can be useful during development, but the sample maker should not have to choose between conflicting instructions in different conversations.
| Area | Details to agree | Useful supporting material |
|---|---|---|
| Fit and size | Sample size, garment measurements, measurement points and tolerances | Measurement sheet, fit references and annotated drawings |
| Material and colour | Selected yarn direction, knit structure, colour reference and finishing | Swatch identifier, colour card and close-up images |
| Construction and artwork | Seams, edges, closures, design scale and placement | Technical sketch and artwork files with version numbers |
| Branding | Labels, tags, attachment positions and sample-stage availability | Logo files, dimensions and trim references |
| Review criteria | What will be checked and how feedback will be recorded | Checklist and agreed comparison references |
If a design needs a technical adjustment, we explain the reason and show the proposed change for approval. The buyer should be able to see what will change in the garment before the development team proceeds.
For the sample size, use the buyer’s agreed garment measurements. A size label by itself does not explain the desired fit. If measurements are still missing, identify them as open items and resolve them before making the sample.
4. Confirm the fee, timing and revision scope
Before collecting the development payment, the confirmation should identify the sample garments, the agreed specification, the fee, material or trim work included, and any separately charged dispatch.
It should also explain the estimated start and completion conditions. Yarn availability, material trials, artwork preparation, trims and review time may affect the schedule. Sample-making time and international transit should be shown separately.
Revision terms matter at this point. A sample that needs correction against the approved specification should be reviewed against that specification. A request to replace an approved material, change the design or develop a new fit direction may require additional work. The scope and charge for that work should be agreed before it begins.
This is also the time to clarify any sample-fee credit against a future bulk order. There should be a written offer and its conditions; the buyer should not have to assume that development will automatically be refunded.
5. Review the sample with clear, usable feedback
When the sample is ready, the first review can use full-garment photos, detail images, video and a measurement record. The aim is to compare the garment with the approved brief and identify issues before international dispatch where practical.
The buyer’s physical review then adds information that photos cannot fully provide: fit in movement, comfort, material feel and the overall wearing experience.
Keep feedback specific
Instead of “the fit feels wrong,” identify the measurement or area to review. Instead of “the material needs to be better,” explain whether the issue is softness, thickness, drape, openness or another observed characteristic. Annotated photos and a single feedback list help the team understand the requested result.
Each revision should have a version, a reason and an approval status. When the buyer approves the sample, record the accepted specification and any final changes so there is a clear reference for the bulk-production discussion.
6. Connect sample approval to the production plan
Sample approval is an important checkpoint. Before bulk production, the final order still needs its quantity, colour and size split, packaging, quality requirements, cost and delivery arrangement confirmed.
Keep the approved sample reference and the final specification connected. If the material, construction or branding changes after sampling, check how that affects the product and quotation before approving the change.
For a first small run, read the companion guide to planning 100 custom knitwear sets with a $4,000 budget. It explains how sample development, garments and packaging fit into the earlier commercial conversation.
Questions before commissioning a knitwear sample
Can we start if the buyer does not have a complete tech pack?
The first step can be a review of available drawings, reference images and requirements. The information needed to make and assess the sample should then be agreed in a written brief before production begins.
Should we approve the material before making the garment?
Agreeing the material direction first helps define the sample. A physical swatch stage can be useful when colour, texture or hand feel needs an early check; its scope and cost should be agreed separately.
Are all sample changes free?
Revision terms depend on the agreed development scope. Corrections and new design requests should be distinguished, with any additional charge explained and approved in advance.
How long does sample development take?
The estimate should follow the material, design and trim review. Confirm the start conditions, review stages and dispatch separately rather than treating one generic lead time as a promise for every project.