
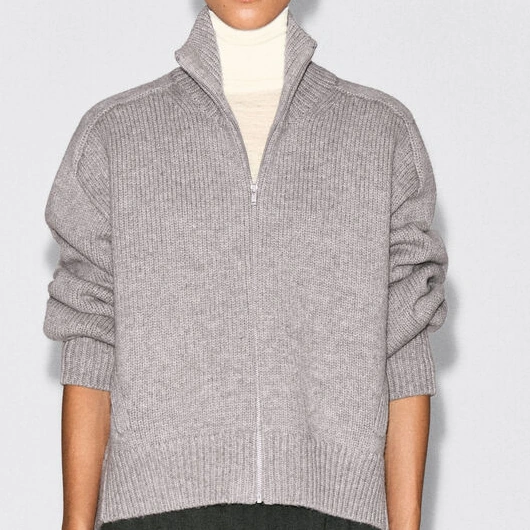
The same body can take on a different outline with a different hem, while neck and cuff trims also affect access and contact. Separate intentional design effects from issues to improve. These six edge directions connect local appearance with the whole garment and bring relaxed dimensions, stretch and finished behaviour into the review.
Rib cuffs: balance contraction and sleeve volume
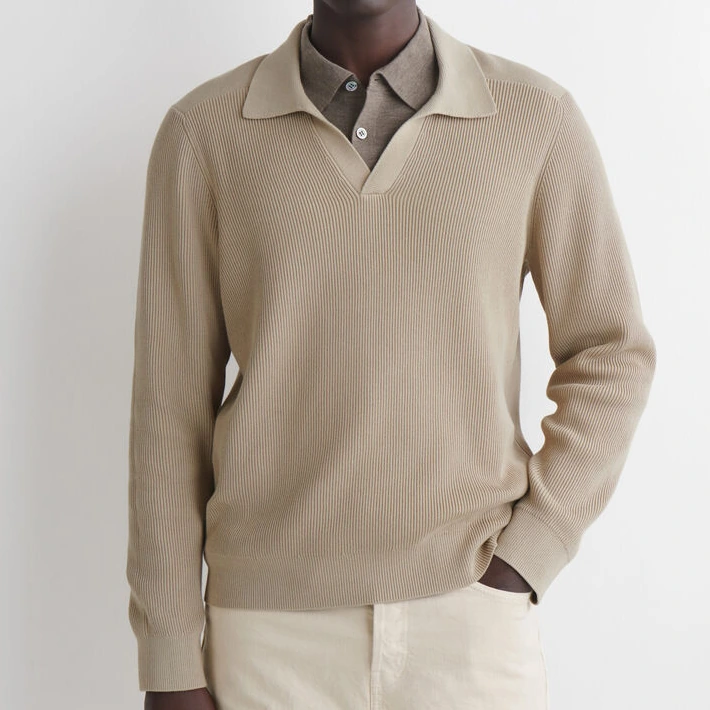
Rib cuffs introduce a different surface and outline at the wrist. This pale long-sleeved polo lets you compare cuff and sleeve. Specify cuff depth and relaxed circumference, then check hand passage, comfort when turned up and recovery after release. Replace vague requests for a tighter cuff with measurable targets.
- What to check in the sample
- Check relaxed circumference, stretch, hand passage and recovery.
A useful way to brief the factoryUse moderate contraction with comfortable hand passage and no obvious looseness after release.
USE THIS IN A STYLE BRIEFSpecify where the cuff should sit and how much it should contract, then fit it with the sleeve. A roomy sleeve does not automatically call for an equally roomy cuff.
Broad rib hems: shape the proportion
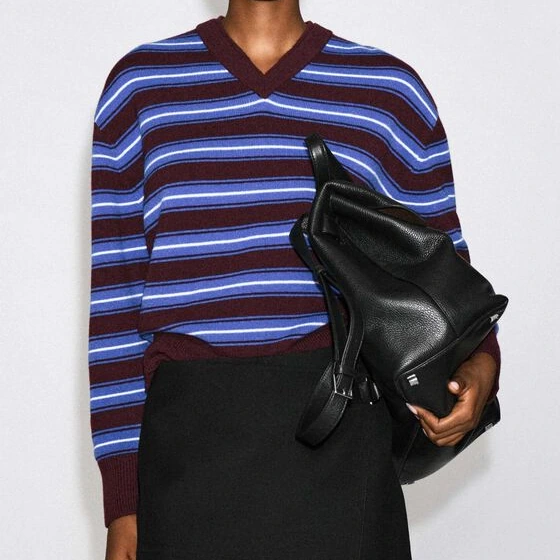
A broad rib hem forms a horizontal area. This striped style lets you compare the body pattern and darker trim. Excessive contraction can change how the body hangs, while insufficient contraction can lose the intended outline. Specify depth and relaxed width relative to chest width, then review standing and seated appearance.
- What to check in the sample
- Check hem depth, width, side joins and rolling during standing and sitting.
A useful way to brief the factoryKeep the broad rib proportion with gentle contraction rather than a strongly bloused body.
USE THIS IN A STYLE BRIEFMark hem depth alongside body length and review the outline standing and sitting. For a straighter fall, state the acceptable degree of contraction.
Crew-neck trims: flatness and joining
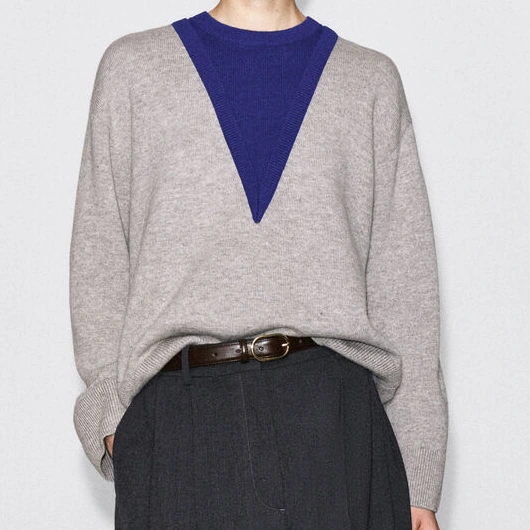
Trim depth changes a crew neck’s visual weight, while its join affects bulk and comfort. This grey-and-blue layered style shows a rounded neck alongside a V-shaped colour boundary, so compare the actual neck trim with the decorative line on the front. Check the trim for flatness, inspect join bulk from the side and reassess it after wearing and taking off the garment.
- What to check in the sample
- Check trim depth, join handle, back-neck fit and recovery after access.
A useful way to brief the factoryKeep the neck trim flat and clean with a comfortable inside join.
USE THIS IN A STYLE BRIEFSeparate the actual neck trim from decorative divisions and underlayers. Use a detail reference for joins and flatness, then review the opening in the whole garment.
Rolled edges: establish the intention
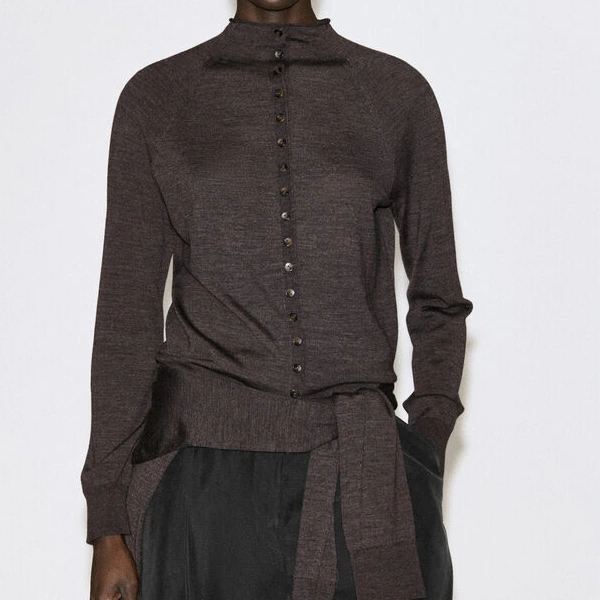
A rolled edge may be deliberately retained for a lighter finish. The upper edge of this standing-collar cardigan offers a small-roll reference. Record the intended direction and extent. If the approved target is flat, unwanted curling should be reviewed against that target rather than accepted simply because rolling is possible in knitwear.
- What to check in the sample
- Check roll extent, symmetry, inside/outside appearance and changes after care.
A useful way to brief the factoryThe roll is intentional; match the direction and extent of the approved sample.
USE THIS IN A STYLE BRIEFIf rolling is intentional, describe its extent and shape; if a flat edge is wanted, show that target. Agree the effect before judging the sample.
Placket edges: assess the complete line
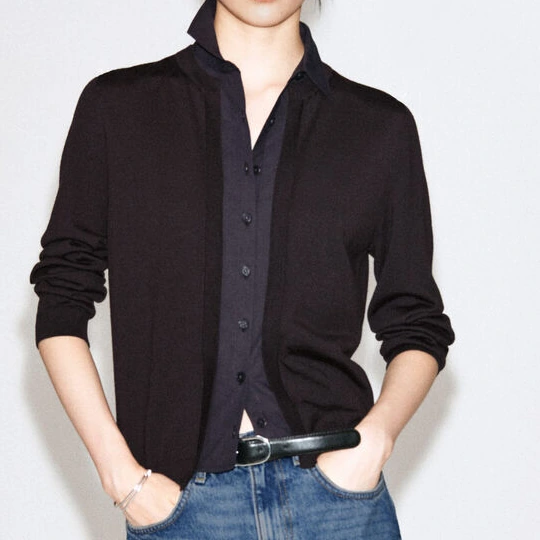
Inspect the neckline-to-placket junction, buttonholes and hem intersection. This dark layered cardigan provides a reference for the continuous front edge. Review individual holes and then the entire fastened front; a close-up alone can miss mismatched lengths or a front that does not hang straight.
- What to check in the sample
- Check full-length flatness, hole support, lower alignment and repeated fastening.
A useful way to brief the factoryFinish the bands neatly and review the whole centre front fully fastened.
USE THIS IN A STYLE BRIEFReview the full placket line where it meets body and neck. After changing local tension, recheck front length, fastening and left/right balance.
Zip edges and openings: inspect inside too
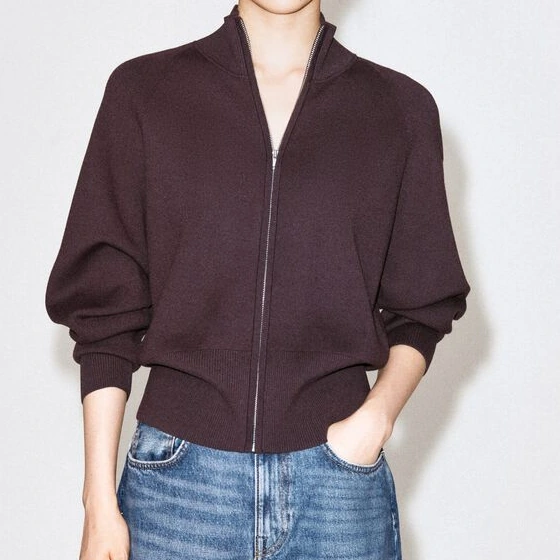
Zip edges involve appearance and contact comfort. This fully opening knit layer illustrates the centre-front length and lower end. Other openings, including side splits, need separate dimensions, positions and end finishes; they are not illustrated by this photo. Turn the sample inside out to inspect hardware, endpoints and areas touching the skin.
- What to check in the sample
- Check zip ends, any covering, inside flatness and endpoint security.
A useful way to brief the factoryPrioritise a flat outer edge and inspect inside contact areas and opening ends.
USE THIS IN A STYLE BRIEFSpecify inside contact, covering and edge attachment requirements. Check flatness and smooth operation in the assembled sample.
Turn the reference into a clear brief.
| Area | Specify | Review state |
|---|---|---|
| Neck | Trim depth, opening, join | Before/after access |
| Cuff | Depth, circumference, stretch | Hand passage and recovery |
| Hem | Depth, width, contraction | Standing, sitting, after care |
| Front/opening | Position, dimensions, inside, ends | Operation and both faces |
Four steps for sample review
- Mark neck, cuffs, hem and openings separately on the reference.
- Identify edges that must lie flat and any intentional roll.
- Record relaxed dimensions and the necessary stretch check.
- Inspect both faces and confirm the result after care.
Common questions
Is a tighter rib always better?
No. Access, movement and silhouette matter; excessive contraction can distort the body or feel uncomfortable.
Is a rolled edge always a defect?
First establish the intended design, then compare extent, symmetry and changes after care.
How do I request trim changes when the body is approved?
Identify the approved body qualities, then mark the trim, target appearance and wearing issue. Recheck adjoining areas and overall proportions after local changes rather than approving from one detail photo alone.
Agree trims through detail references and garment review
Review each trim locally and in its effect on the garment. Records of relaxed and worn states help explain why a revision is needed.
- Gather separate neck, cuff, hem or placket references and mark intended depth, contraction and any deliberate roll.
- Compare trim construction with the proposed body swatch and agree applicable relaxed dimensions, stretch behaviour and finishing conditions.
- Once assembled, check proportions, access, contact and left/right consistency; revisit adjoining areas after revisions.
Mark the trim detail you want to improve
Bring full-garment and detail photos, a target trim reference and sample notes. Explain what is already working and what should change to give the discussion clear boundaries.
Discuss knitwear trims ↗Technical references
Confirm construction and performance with agreed samples and appropriate testing. The following references provide further reading.
- Woolmark · Introduction to Knitwear
- CottonWorks · Shrinkage & Skewing
Product photographs are design references, not a claim about DALANG project work.
A customer brief: intentional openings still need stable edges
A brand requested a sweater with decorative openings near the sleeves and hem and asked that the surrounding knit be stabilised, with a continuous lining behind the outer layer. The opening map and production files had not yet been finalised. Mark the intended locations and agree how the edge and lining should be evaluated in a sample; the enquiry does not prove the construction was tested.